LIVRAISON GRATUITE aux États-Unis et au Canada
Couch Ramp Railing Kit
$74.99
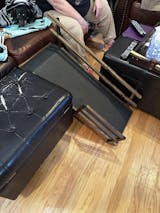
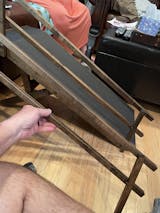
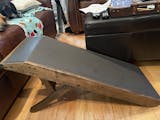
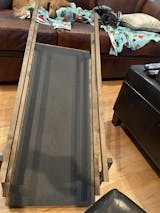
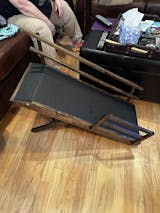
Our safety rails are an excellent feature for keeping your dog safe & secure while using our Couch Ramp. The rails help prevent dogs from taking shortcuts over or off the ramp, and are great for senior or disabled dogs who are prone to missteps. Just like our ramps, the rails are made of furniture-quality solid Maple hardwood.
Each Railing Kit includes:
- 2 long side rails (railings are approx. 8.5" high once installed).
- 1 top end rail.
- Bolts & allen key
- Threaded inserts (only needed if you are retrofitting our old/original Couch Ramp. Please see our Retrofit Tutorial if you are retrofitting).
Please note:
- As long as you purchased your Couch Ramp from us after November 20th, 2023, then you have the new version of the Couch Ramp which already has the threaded inserts installed and is ready to attach the railings with just the bolts & allen key! If you aren't sure, just look at the outer sides and top end of your ramp - you should see empty holes - this is where the railings would attach. If you don't see those empty holes, you'll need to do the retrofit.
- The Railing Kit is non-returnable and final sale (unless of damage or defect).
The DoggoRamps Difference
Made from solid Maple hardwood(not plywood or soft pine like the others) and crafted in our North American workshop; DoggoRamps are made with the same care you'd expect from true furniture — and designed for the dogs who deserve it most..
When you choose DoggoRamps, you're not just buying an amazing ramp — you're supporting local craftsmanship, meticulous design, and a small business that started with one little dachshund who needed help getting onto the bed.
⭐ Furniture Quality to Complement Your Home
⭐ Strong & Sturdy, Built to Last
⭐ Beautiful, Unique Wood Grain in Every Ramp
⭐ Premium Finishes & Rich Stain Absorption
⭐ 60-Day Money-Back Guarantee + 1-Year Warranty
How We Match Up
Combines the smaller footprint of a step with the ease of a ramp
Sometimes a ramp might be too big for your space, and steps just aren't ideal for dogs that should avoid jumping impacts
Soft rubbery, incredible traction, easy to clean
Slippery, toenail snag hazard, hard to clean
Further enhancing this step/ramp as a space-saving solution
Regular ramps or steps take up space without storage
Premium finishing quality and staining
Less attention to detail and quality control
Furniture-caliber, strong, sturdy, long-lasting
Not very strong, prone to breaking/damage
Supporting local business & jobs
A one-time investment in quality, safety, and peace of mind
Many buyers go through multiple lower-quality ramps before switching to ours
These rails are outstanding and easy to install for the safety of my dachshunds. Especially for my oldest dachshund who is fourteen and with his eye sight and hearing starting to go. I purchased these rails to keep him and my other two safe from falling.
This review is for our purchase and installation of the Doggo ramp rail kit for an earlier production ramp. The ramp was the second one we bought, after first buying a cheapo clone of this one. Let me start by saying, don’t do it. Save your money on the cheaper stuff, and just go ahead and get yourself a quality Doggo ramp. It costs a little more, but you’ll be glad you did it. My wife felt like we needed to add the side rails to this ramp, after our little Hanna began to wobble a little bit going up and down the ramp. We ordered the kit, and were a little bit bummed out when it arrived, because we didn’t initially know that the kit is made for 2nd generation ramps, which means that it wouldn’t just bolt on. I realized that I was going to have to do some measuring & drilling to make this thing work. Not thrilled, but I told myself that “I can do this”. The kit comes with three rails, so you can install all three but you won’t want to, because your buddy will be at a dead end if you do. We looked at our particular application and needs, and decided that we needed both side rails, but no end rail, so they could exit the ramp at the top and walk out on to the sofa. I made my measurements, drilled my holes, and installed the first side rail. After installing the first rail, I first thought that I had been sent two left side rails, and no right side rail. After very carefully studying the diagrams, I realized that there are no left and right side rails. They’re both the same. Well, I’m just not digging that, so I took the second side rail apart, and reassembled it so that the rail looked like it was made to be installed on the other side. This really isn’t a structural problem but it makes it look weird, and I just didn’t like that, so I fixed it. We slid it into place, and used it for a day or so, but due to our particular application, we (I) didn’t like how the one side rail was just a bit too far up toward the top of the ramp, so our Dewey couldn’t just make the turn and exit the ramp on to an ottoman where I sit. He likes to step off the ramp on to my extended legs on the ottoman (we refer to this as “riding the leg hammock”), but with this side rail in position, he was unable to do so. After thinking about this for a while, I decided that I would remove the previously installed side rail, and install the shorter rail that was intended to be used for the end of the ramp in its place. This would give maximum protection from the middle of the ramp down to the bottom, and would allow our Dewey to climb the ramp to the top and exit on to the ottoman, if he chose to do so. This may not make a lot of sense to those who can’t actually see it, so I am going to try and include several pics of our particular application, and the various ways I modified the ramp. The end result is a ramp that is fully functional for our babies. The quality is exceptional, and it looks great! We really love it! I apologize for this review being so long. It may be boring and useless to some, but I try to be thorough and concise with exactly what we experienced, and the steps I took to overcome our challenges. I suppose the ultimate take away is, if I can do it so can you! Thanks, Ryan for loving Crusoe & Daphne enough to create this marvelous ramp and rails. We love ours to the moon and back too, and just want to offer them the best products available.
Doggo Ramps is awesome and have been a great company to work with. We recently bought the rails that work with couch ramp that did not originally come with rails. The package came promptly. However there are no instructions with the package you will need to watch a YouTube tutorial (not a big deal, but if you're having wifi issues that day like we were you'll get frustrated) Also I somehow missed you will need a drill, a drill bit to bore, and gorilla glue which we were not aware of. Thank God my husband has tools or we would have been completely out of luck. The instructions say to drill the lengths of the anchor, but you actually need to drill the length of the screws which are several inches/cm longer than the anchors. Then you need to let everything cure with glue overnight. Overall a confusing and somewhat frustrating installation. However once everything is installed, of course it's top quality and I see it's always worth the price you pay. I will still continue to use Doggo Ramps in the future. They have a loyal customer. I just hope they see this review and maybe fix their instructions
Couch Ramp Railing Kit
Love it.
When the couch ramp with rails was announced I loved the idea because my senior dachshund I had noticed was becoming hesitant to use the couch ramp but had no problem with the bigger and higher bed ramp and realized it could be a result of the railing making her more confident. However, I wasn't sure about buying a whole new ramp but then I saw that DoggoRamps had created the COUCH RAMP RAILING KIT to modify the original couch ramp and I was sold! Now my dog has no trouble going up the couch ramp! It is perfect! I have loved all the products I have purchased from DoggoRamps and the great customer service is a huge plus. Great people and quality products!
I bought the couch ramps several years after I had bought the bed ramp, which always came with a railing. Although I wished the couch ramp came with railings, I bought them because I love the quality of DOGGORAMPS and the fact that they are made in North America. My dog, who will be 15 in May, is having trouble walking due to IMPA (doggy rheumatoid arthritis) and slipped off the side of the couch ramp. Fortunately, she fell on the pillow I had on the ground for just such a possibility and wasn’t injured. The side rails on the ramp have made a big difference in her safety; she now stands at the top of the ramp and centers herself before using the ramp.She and I feel very secure with the new side rails.
We had to do drilling in order to install the railings to our older model couch ramp. All parts we needed were included and the railing looks great. Would definitely purchase again if needed for our other chair ramp.
Partage
DoggoRamps Inc.
Les meilleures rampes pour chiens de canapé et de lit pour petits chiens ainsi que pour chiens de taille moyenne et grande ; Fabriqué à la main à partir de bois dur massif et 100 % fabriqué en Amérique du Nord !
-----------
Contactez-nous à doggoramps@gmail.com
© 2025 DoggoRamps Inc..
Copyright DoggoRamps Inc. 2025
Commerce électronique propulsé par Shopify

